

Upload, manage, and assess your inventory using our one-of-a-kind Helix Mobile (formerly BidMobile) app for iOS—easily create a comprehensive inventory so you never lose track of equipment again. Our intuitive interface makes adding items a snap. From scanning barcodes to including photos and essential details, the app will help you breeze through keeping inventory up to date.
You can also download a PDF of the complete tutorial.
Getting Started
Anyone can access and use the Helix Mobile app for free to store and manage inventory on their iOS device. However, to access and manage your inventory on BidMed’s secure, cloud-based Workflow+ platform (formerly Surplus Management System, or SMS) requires a premium account.
Download the App
The Helix Mobile app is available free for iPhone, iPod touch, and iPad in the App Store. The app can be found by searching “BidMed” and may appear as “BidMed Plus Mobile.”
Create an Account
*If you have already signed up through BidMed, you may skip this step and log in using the credentials already established.
After downloading Helix Mobile from the App Store, launch the app on your device.
You will see an initial Log In screen with a link at the bottom that reads “No account? Click here to register!”. Tap this link and complete the details on the Register New User screen (all fields are required).
You will be redirected back to the Log In screen where you can enter your email address and password to begin using the app.
Activate a Helix Workflow+ Account
Access to Helix Workflow+ requires a premium subscription. Please visit BidMed.com/helix/workflow/ to learn more.
Be sure to use the same email address when registering on the app and when signing up for your premium account to ensure the accounts are connected correctly.
Should you experience problems linking your Workflow+ and app accounts, please contact support@bidmed.com.
Adding Items to Your Inventory
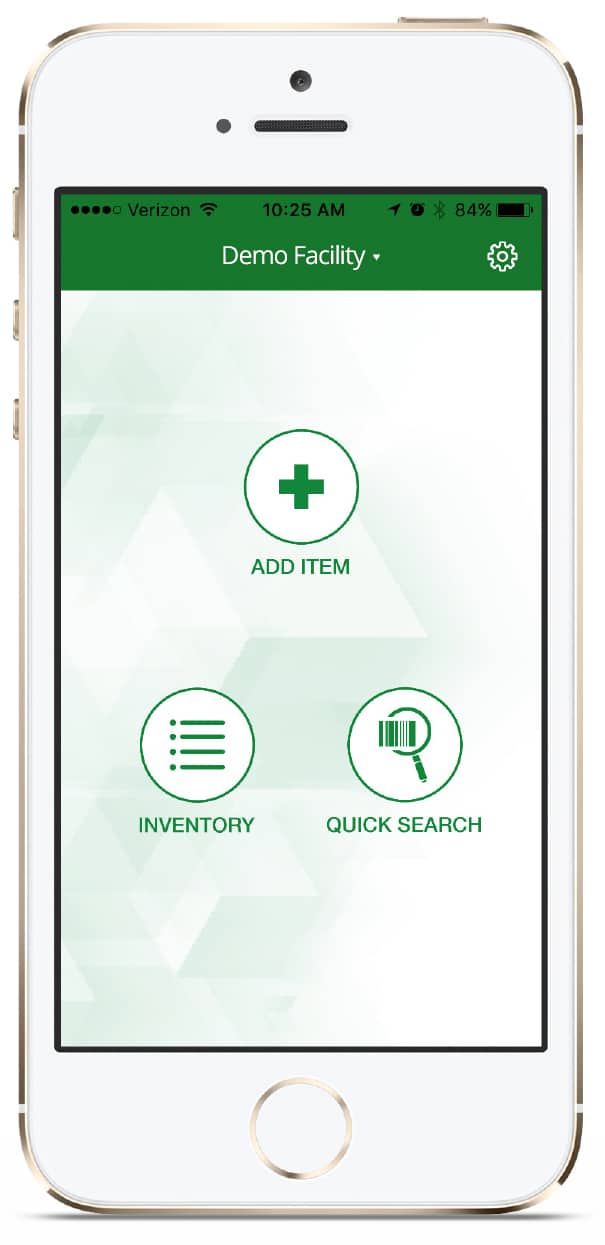
Items added through Helix Mobile will automatically sync to your Workflow+ account and populate your inventory in both locations. To begin, launch the app, log in, and choose “Add Item” from the Home screen.
NOTE: If you have access to multiple facilities, be sure the correct account is displayed at the top of your screen before adding or editing items. You can change facilities by tapping the drop-down and choosing between your active options.
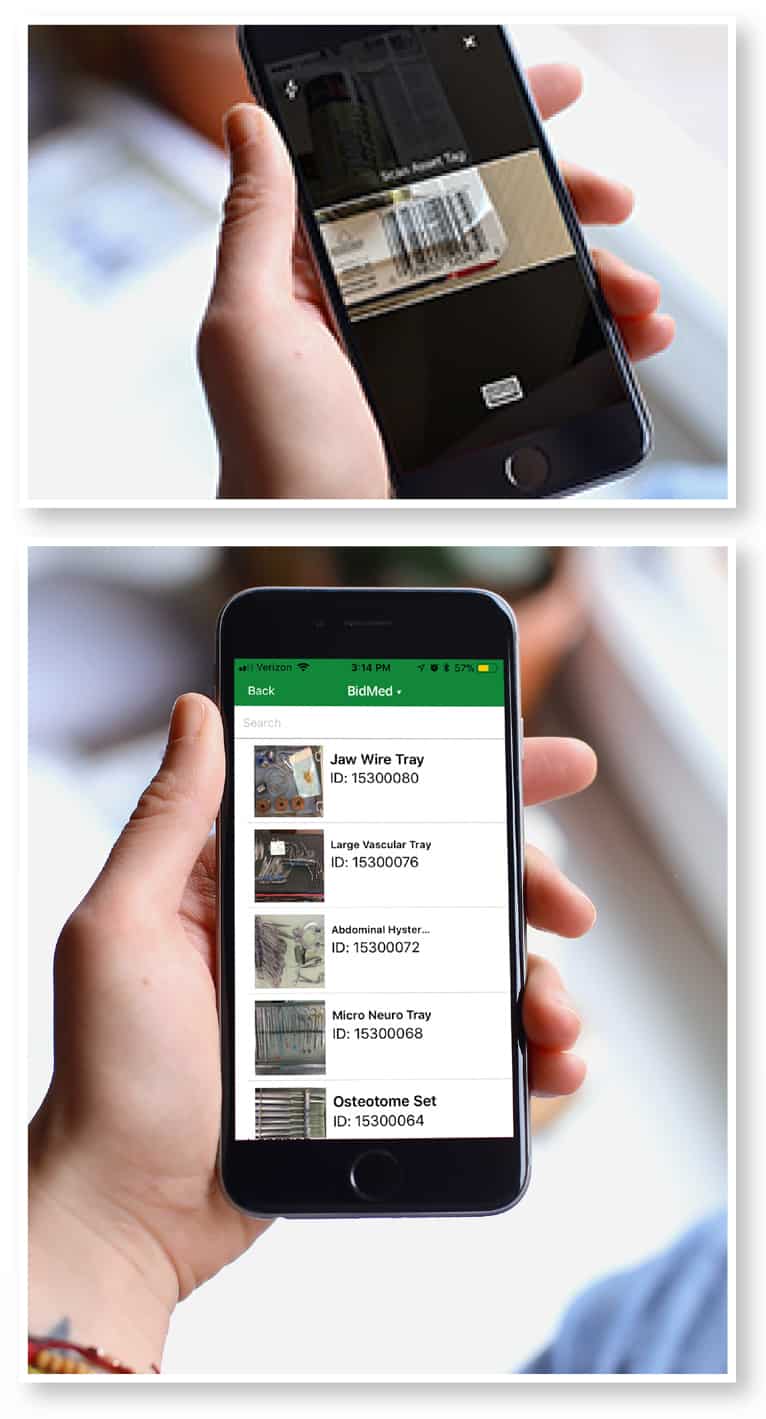
1. Scan Asset Tag(s)
The Helix Mobile app includes a built-in barcode scanner for quicker inventory, which uses your device’s native camera.
A) Scan Asset Tag(s)
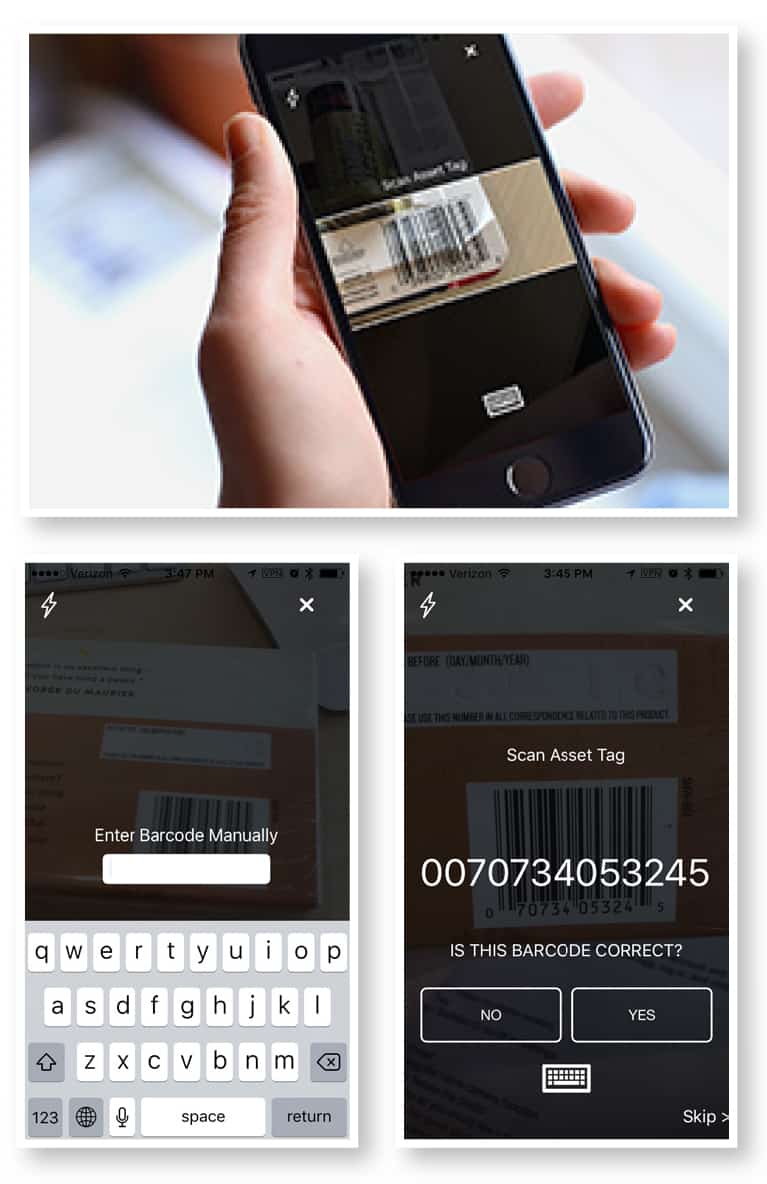
After selecting Add Item from the home screen, the scanner will automatically open*. Simply position the barcode in the center of the field and hold steady until the tag number populates on the screen for confirmation.
Optional Features
Flashlight | if you are operating in low-light conditions, you can tap the lightning bolt icon in the upper left corner for additional lighting.
Manual Entry | if the barcode is not scanning, or if there is an ID number with no barcode, you may enter the ID manually by tapping the keyboard icon at the bottom of the screen. After completing the entry, tap “Return” to continue.
Skip Barcode | if an item does not have an Asset Tag or ID Tag*, you may skip this step by tapping “Skip” in the bottom right corner of the screen.
*Settings can be altered to automatically include or skip Asset Tag and BidMed ID in the “Add Item” steps. Please see the “Adjust Settings” section of this tutorial for details.
B) Confirm Asset ID
When the ID has been scanned or entered manually, you will receive a confirmation message. If the number does not match, tap “No” to repeat previous steps. If the number is correct, tap “Yes” to continue and add images.
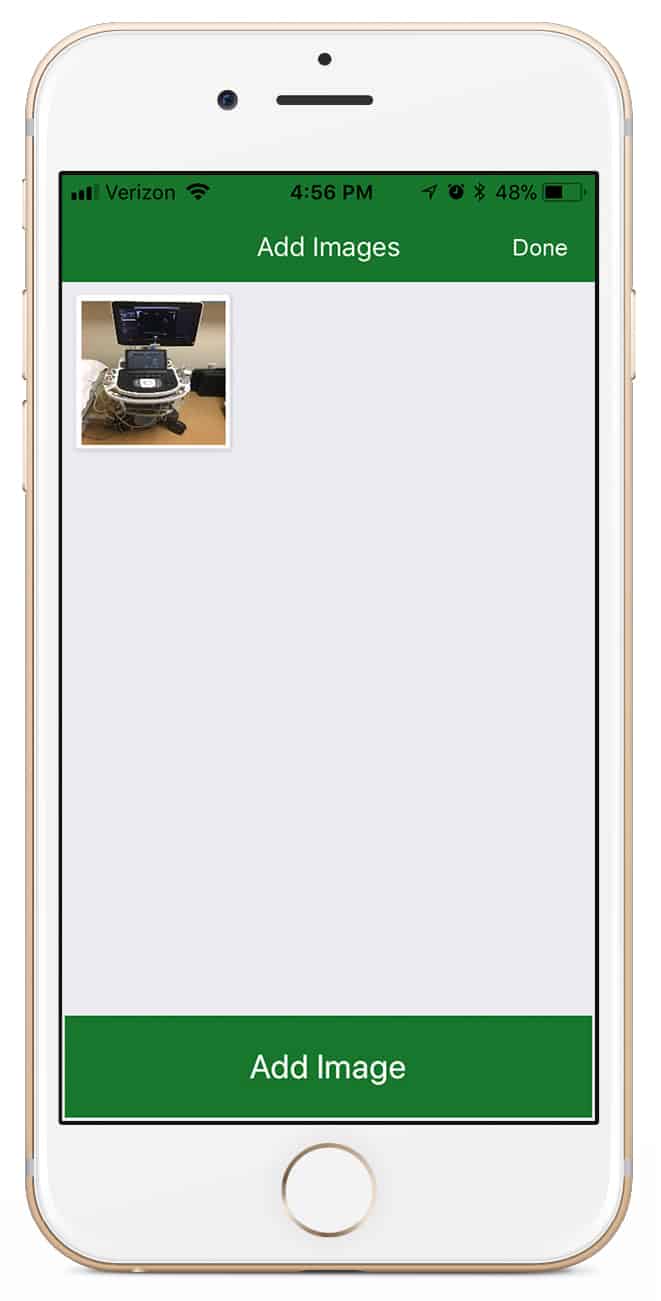
2. Add Photos
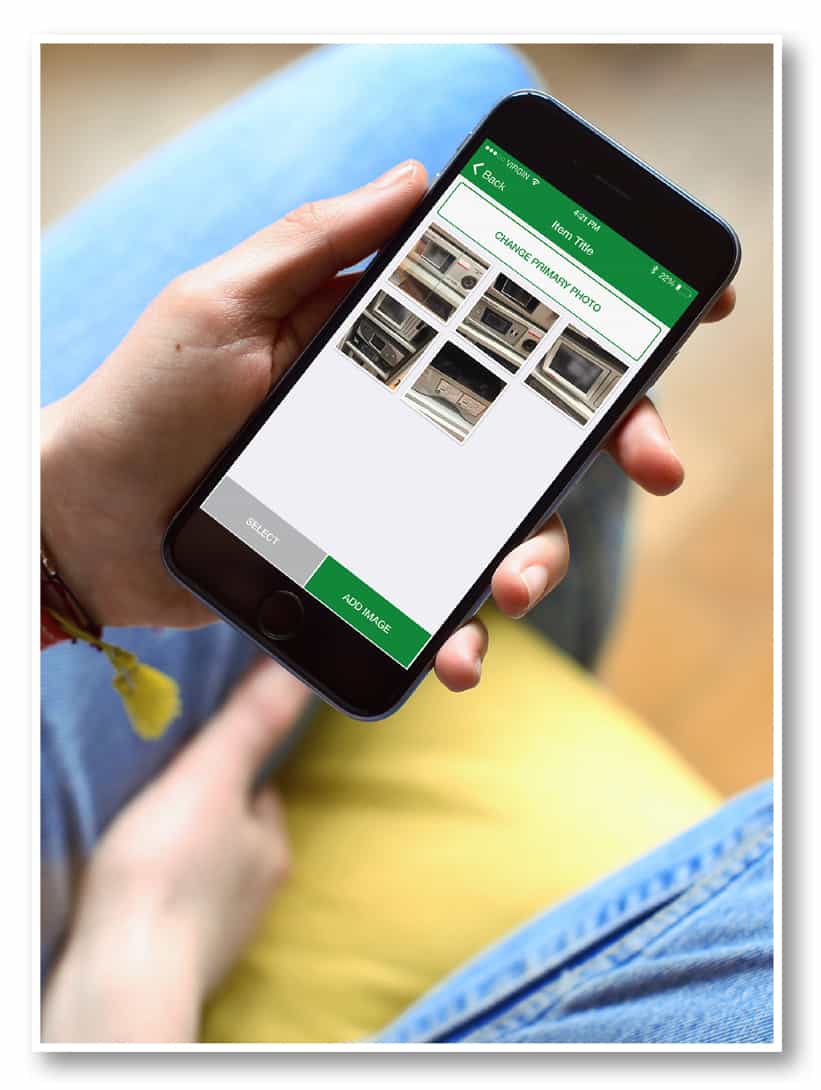
After confirming (or skipping) the Asset Tag step, you will be taken to a screen showing all images for your item. Initially this screen will be blank.
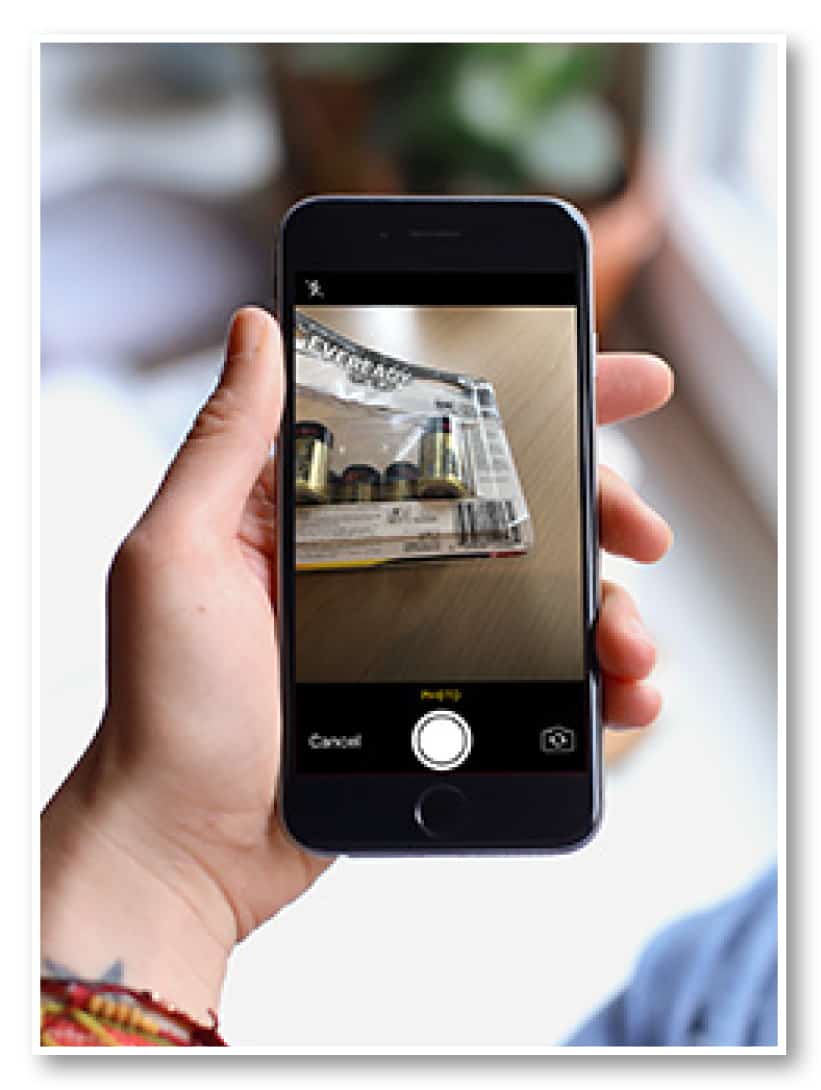
Tap “Add Image” at the bottom of the screen to add a new photo.
Use your device’s native camera function to take a photo of the item. Choose to “Use” or “Retake” your images before adding them to your gallery.
Photos will populate the gallery and direct you back to the main Add Images screen. Take and save as many photos as you would like for each item.
Select “Next” in the top right of the screen to continue to Item Details.
NOTE: You can add, delete, and edit images later under “Editing Items.”
Recommendations for good photos:
Remember, when you are ready to sell items at auction, these images are what potential buyers will see to determine items to purchase. These details are especially important when competing with other sellers in avenues such as the BidMed Exchange.
*It is not required to add images to a new item. Although it is strongly recommended to include detailed photos during initial inventory, images can be added later from the Item Details screen (see “Editing Items in Your Inventory”) or your desktop portal in Workflow+.
Quality: Lighting and Focus | Dark or blurry photos that are hard to discern will often cause buyers to dismiss the item in favor of something more clearly photographed.
Variety: Details and Angles | When buyers are interested in your item, details are important! Include photos of relevant parts or pieces of the asset, as well as at least one image that captures the entire unit as a whole.
3. Enter Description & Details
The final step is adding details, including Make, Model, and Description, plus site-specific location details that will help find assets when they’re ready for disposition.
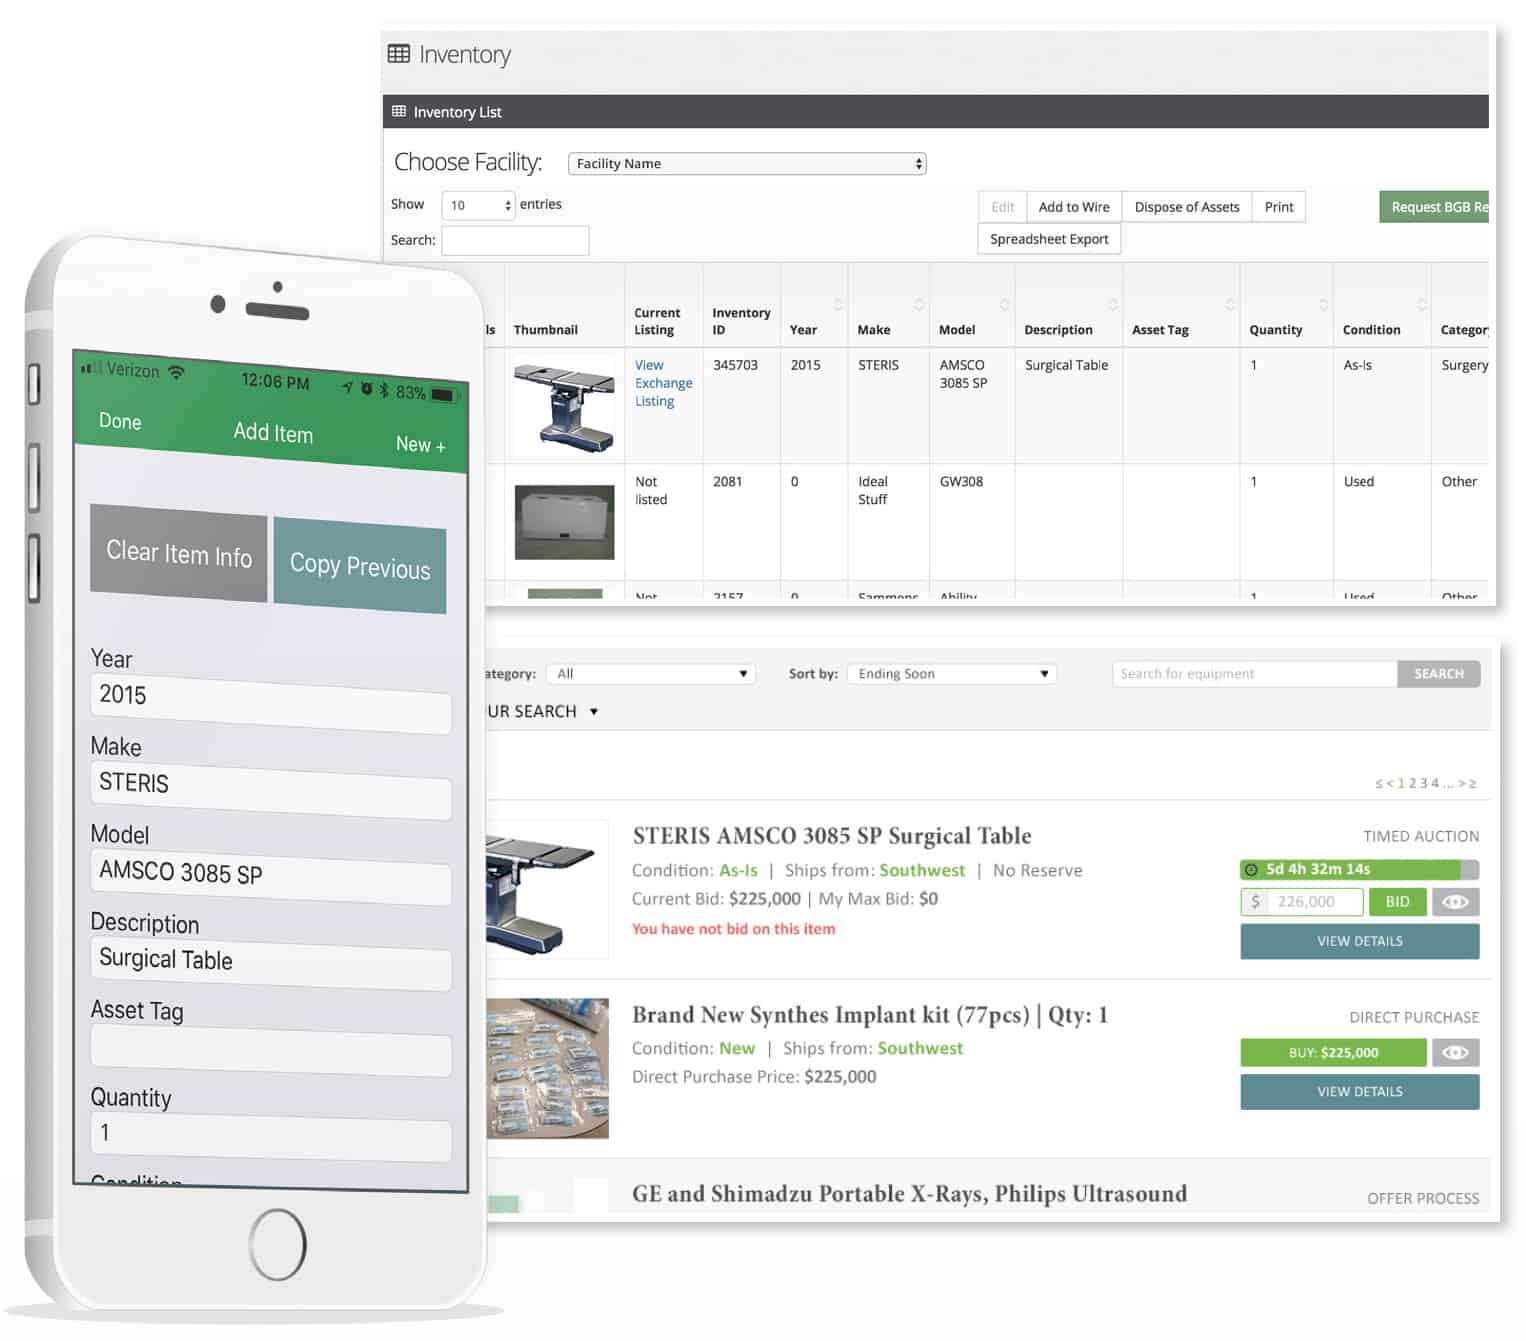
Your item’s display title on the BidMed Exchange (or other disposition platforms) will be the Make + Model + Description entered here.
If no Make or Model is entered, the title will automatically populate as the item’s Description. Items with a quantity >1 will also include a Lot # and Quantity value in their display title.
NOTE: You may override this formula by entering a custom title in the Title field.
Additional fields are available here, but may also be edited through Workflow+. These fields are customizable through your Workflow+ profile, both as an individual and for an organization as a whole (see “Adjust Settings” section).
Save your changes by choosing “Add New” (to immediately add another item) or “Done” (to return to the Home screen).
Clear Item Info | For your convenience, the button “Clear Item Info” will clear all details (except Item ID or Asset Tag) populated and allow you to begin again.
Copy Previous | During large inventory assessments, many times details will be similar from item to item (including things like location, condition, etc). The “Copy Previous” button will populate all details from the last item added through the app (except Item ID or Asset Tag). Users can then edit specific fields to distinguish one from others.
QuickLoad Inventory Verification
QuickLoad Inventory Verification is a quick and easy way to expedite the inventory process, available for organizations with unverified or semi-complete data available. This feature is only available through Workflow+ with a premium account.
Using this feature, item details are pre-populated for known assets when they are scanned during the physical inventory process. These details can then be added to, deleted, or edited through the Helix Mobile app or through Workflow+.
Upload Initial Inventory
Contact support@bidmed.com to get started with a QuickLoad inventory template. These assets will be added to your account but will not appear in your Workflow+ inventory until the assets are scanned using the app.
Verify & Update Assets In-App
1. Scan Asset
From the Home screen, select “Add Item” and scan the asset tag (see “Adding Items to Your Inventory” above).
Note: confirm whether your workflow includes “Item ID” or “Asset Tag”—these fields must match your initial data.
2. Add Photos
Add photos as you would for any new asset. Images do not populate from a pre-loaded database.
3. Edit Details
Items included in the initial database upload will pre-populate any details available. From the Edit Details screen you may add, delete, or edit any details necessary.
Reconcile Database in Workflow+
Only items that were physically scanned through the process will show up in your Workflow+ Inventory. You can export this inventory to compare or reconcile with previous documentation to confirm if assets are still where you thought they were.
Finding Items in Your Inventory
Search by Keyword
To quickly find an item in your inventory by keyword, tap the “Inventory” button from the Home screen, then enter the keyword(s) in the search field at the top of your Inventory page.
Search by Barcode
You may also quickly search your inventory by barcode, asset tag, or Item ID using the “Quick Search” button on the Home screen. This will launch the barcode scanner, which will automatically return items in your inventory matching the associated number.
Editing Items in Your Inventory
Locating Items
To find items quickly in your inventory, see Finding Items in Your Inventory.
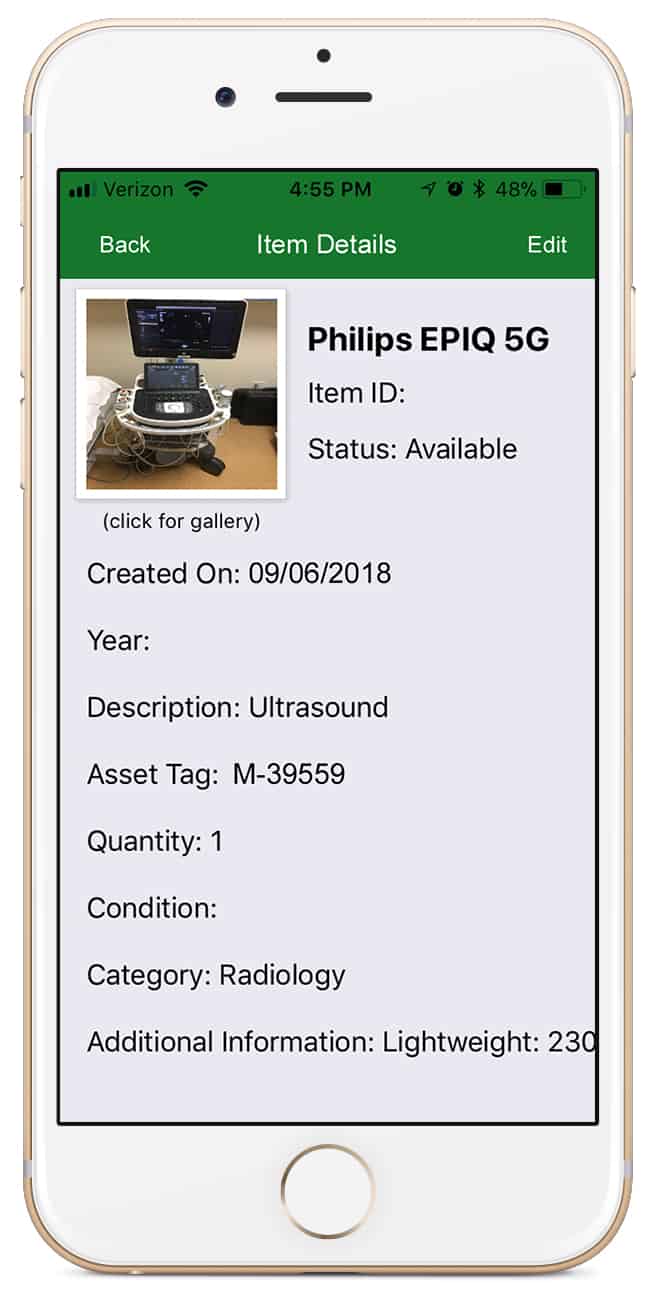
Editing Details
Once you have located an asset in your Inventory, open the Item Details page by tapping the item. From the Item Details page, tap “Edit” in the upper right corner.
The Edit Item screen includes all the fields available based on your settings (similar to those seen on the Add Item screen). Update fields here and select “Save” at the top right of the screen, or tap “Done” to exit without saving.
To delete an item, scroll to the bottom of the Edit Details screen and tap the “Delete Item” button. This will remove the asset from your inventory on the app and in Workflow+.
If you inadvertently delete an item with significant details, you may contact support to have it restored. For best results, please contact us as soon as possible and know the asset tag of the deleted entry.
Adding and Editing Photos
View all images saved for an item by tapping the primary image displayed at the top left of the Item Details screen. This will open your Image Gallery.
Add Photos
From the Image Gallery screen, tap the “Add Image” button at the bottom of the screen.
Edit Photos
Editing photos is currently not available through the app. However, users may edit and delete images through the Workflow+ portal, including changing the primary photo.
Adjusting Settings + Trouble Shooting
Change Your Facility
If you manage inventory for multiple facilities, it is important to ensure you are adding items to the appropriate account.
The active facility name is displayed at the top of the Home and Inventory screens. To change this facility, tap the name and select the correct account from the menu.
Inventory Workflow—Item ID and Asset Tags
We recognize that different users have different workflow needs. To optimize the inventory experience, you may adjust whether scanning Item ID and Asset Tag information is included during the Add Item process. This eliminates the need to repeatedly skip these steps if your facility does not utilize this information.
From the Home screen, tap the gear icon in the top right to access your settings. On the Settings screen, toggle on or off “Scan Item ID” and “Scan Asset Tag.”
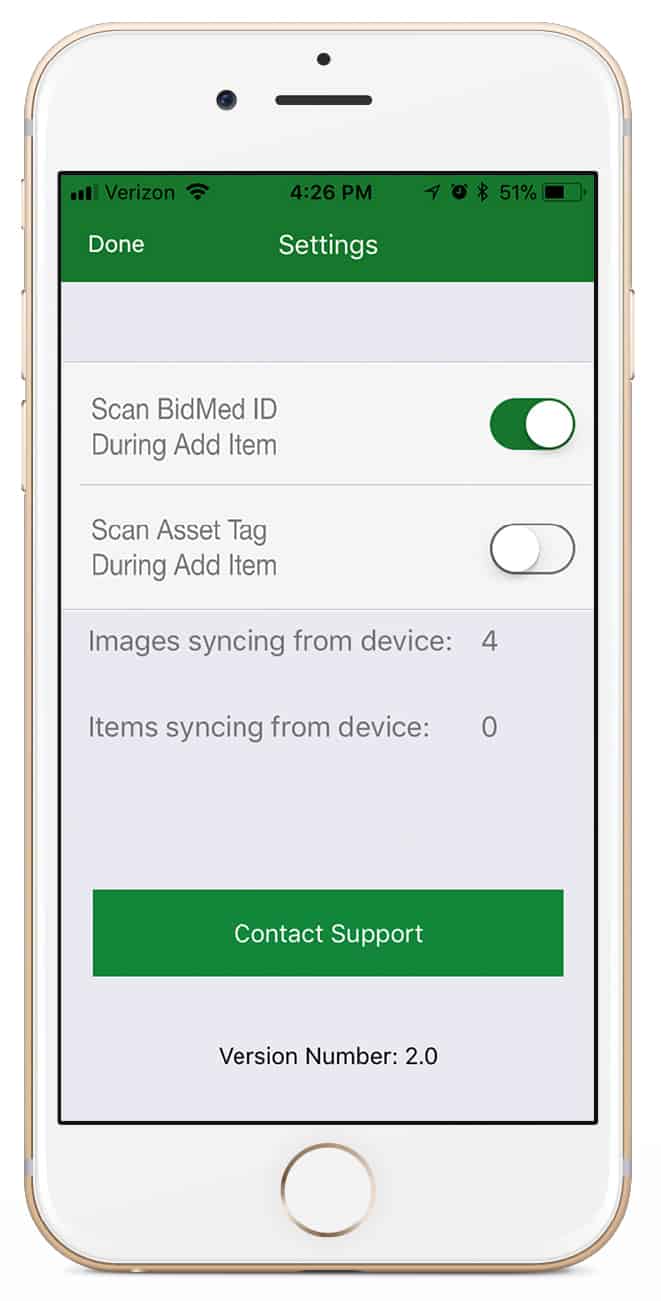
Syncing Items and Images
Data logged in the app will sync to Workflow+ when connected to WiFi. Be sure to sync frequently by visiting the Settings screen in the app while connected to WiFi. If items are not syncing, stop inventorying with that device and contact support.
Support & Bug Reporting
Should you run into issues using the Helix Mobile app, support is available directly from the Settings screen of the app. You can also visit plus.bidmed.com/support.php.
Please include your email address and as many details as possible regarding your issue, including what you were trying to do, how you got there, and what behavior occurred instead. Screenshots of the issue are often invaluable when trouble shooting, as well.
Changing Item Detail Fields
Default Item Detail fields are provided for new accounts and include Make, Model, Quantity, Condition, etc. However, the fields available are customizable by Organization and Account through the Workflow+ portal.
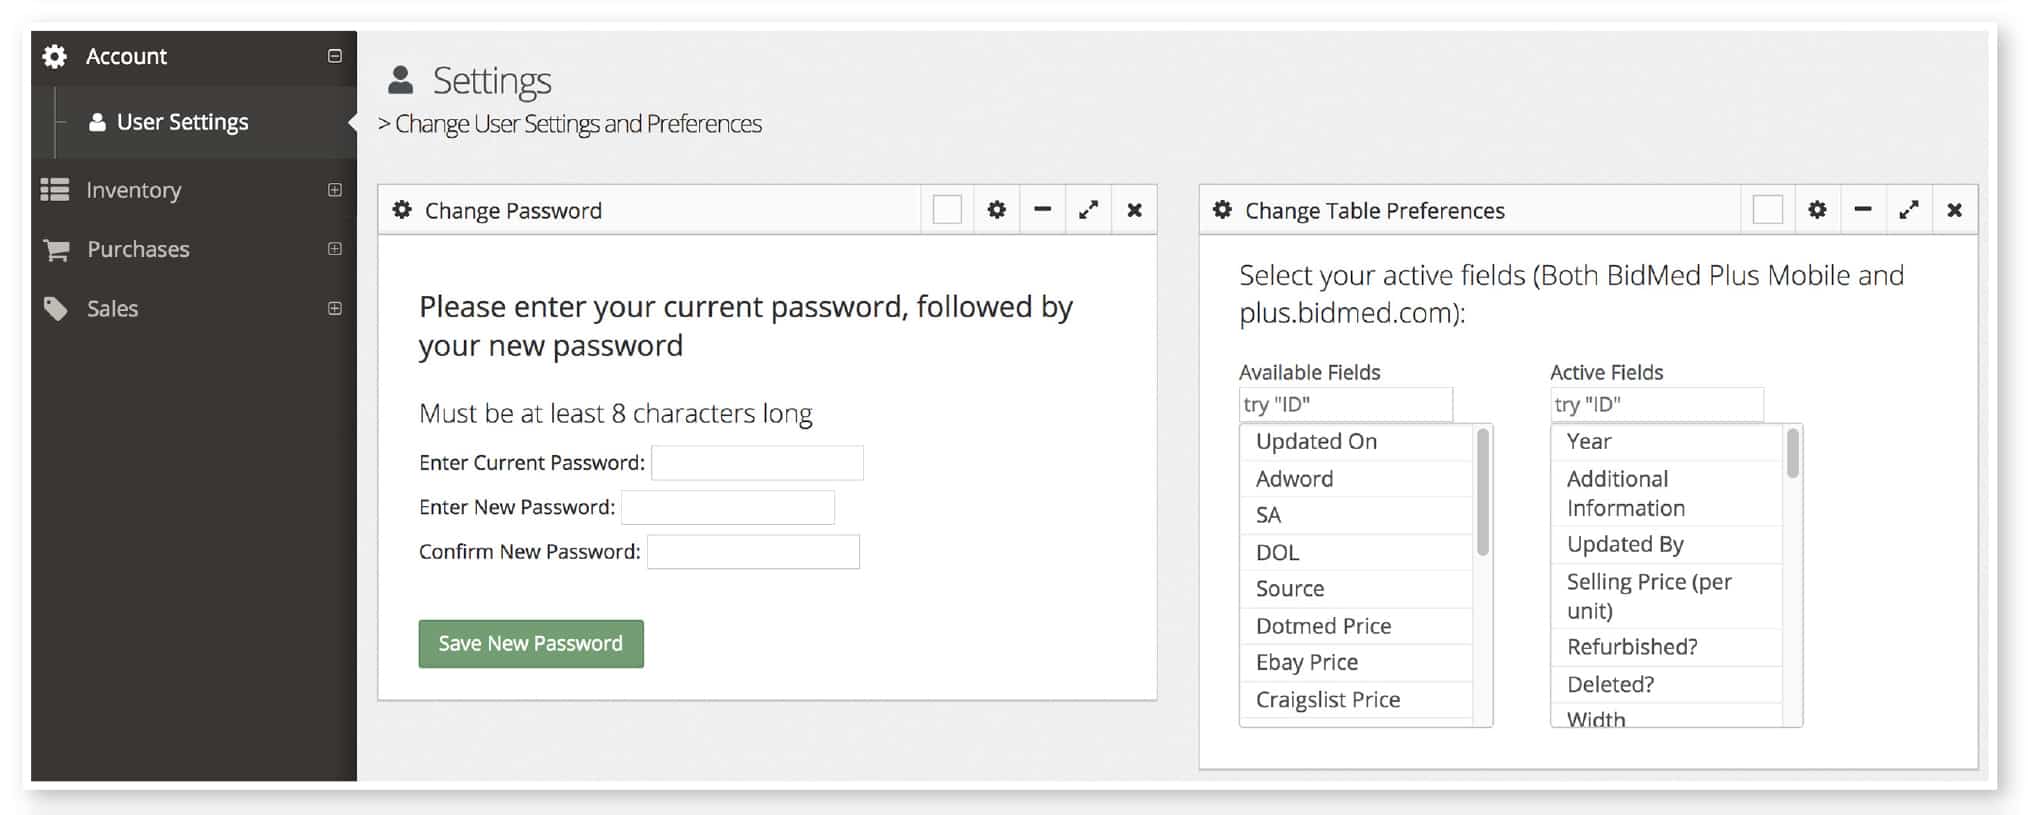
Add and Delete Fields
1. From the navigation panel on the left side of the Workflow+ portal, select Account, then User Settings.
2. In the “Change Table Preferences” module on the right, select fields to shift them from “Available” to “Active.”
- “Active Fields” are currently viewable in your account.
- “Available Fields” are available but not currently viewable for your account.
- You may use the search fields to quickly find options to add or delete.
Change Order of Fields
In Workflow+, navigate to the Manage Inventory screen (under Inventory). Users may drag and drop the columns in this table according to personal preference. Changes are automatically saved for your individual account.

To activate these changes in the app, be sure to quit and re-launch the app after making changes in Workflow+.